
Monday, March 24, 2008
Thursday, March 20, 2008
Books Mentioned in Our Session

from the review at http://www.light-and-shadow.com/
John Shaw is an accomplished nature photographer who is well known for both his landscapes and his close-up photography. The book is filled with examples of his work, which he uses to illustrate various concepts. Unlike some books, Closeups in Nature is intended to be comprehensive, covering just about every aspect of macro photography. It even includes a discussion on general photographic techniques such as exposure control and metering. This will be, to some extent, a review of material which is presented in some of Shaw’s other books, or any general book on photographic technique for that matter. This section may therefore be unnecessary, since anyone interested enough in photography to do macro work, probably already has one of these books, but the material is there for those who need it.
After the discussion on basic principals, Shaw moves on to discuss close-up specific topics. Macro work is a highly specialized form of photography, and as such, requires equally specialized equipment. Throughout the book, Shaw describes the type of photographic gear that are required to obtain quality photos at high magnification. He covers the various optical methods for obtaining high magnification such as macro lenses, close-up diopters, reversal rings, extension tubes and bellows; He also recommends the types of camera supports (tripods, ballheads and focusing rails) that will be needed. The description of the needed photo accessories is very detailed. There is a whole chapter devoted to macro flash photography. There is even a section where Shaw describes how to make your own macro accessories (a light reflector and a flash bracket). If you are inclined to follow these instructions, making these items yourself could actually save you several times the cost of the book. If you don’t believe this, just check out the price of flash brackets at Kirk or RRS!
Closeups in Nature was first published in 1987, and the only criticism I can think of is that the book seems a little dated at times, particularly when referring to camera equipment. Some of the gear that Shaw recommends, may no longer be the best choice; that said, the basic principals of photography have remained unchanged, and the discussions on technique and composition are just as valid today as they were when the book was first published–even if you now use digital. Overall, this book is an excellent reference, containing a wealth of information and photographs.
See galleries of John Shaw's work at http://www.johnshawphoto.com/galleries.html
 Scott Kelby The Photoshop® CS3 Book for Digital Photographers
This is the latest in a series of books geared to teaching Photoshop to photographers. The books ignore the gee-whiz features of Photoshop ("making pigs fly") and concentrate on the features photographers need, including color correction, selections, adjusting perspective and converting images to black and white.
Be sure to get the book that is specific to your version of Photoshop or Elements.
Check out information on other Scott Kelby books and seminars at http://www.scottkelby.com/
Comparing Judy's Tulip with Martha Graham

At left, Judy's tulip image.
At the right:
Barbara Morgan (American, 1900-1992)
Martha Graham Letter to the World, 1940
To learn more about Modern Dancer Martha Graham, go to http://www.edwardsly.com/grahamm.htm
or http://marthagraham.org/center/
At the right:
Barbara Morgan (American, 1900-1992)
Martha Graham Letter to the World, 1940
To learn more about Modern Dancer Martha Graham, go to http://www.edwardsly.com/grahamm.htm
or http://marthagraham.org/center/
Monday, March 10, 2008


Friday, March 07, 2008


Wednesday, March 05, 2008


Tuesday, March 04, 2008


Carolyn's Purple Tulips
Carolyn ran into one of the dilemma's we photographer's often face. While shooting indoors without a flash, her image came out amber colored. This is a sure sign the image was taken with either AWB (auto white balance) or one of the outdoor white balance settings, like daylight, cloudy or shade.
To correct this amber color cast while shooting, one could:
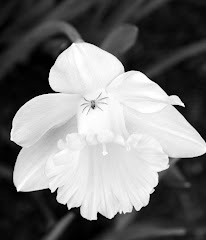
b..jpg) I am often asked if you can color correct an image. The answer is "sort of". Below is Carolyn's image corrected, as well as the corrected version of Alexa's tungsten image. In both cases, it was possible to neutralize the shadow (black) and highlight (white) parts of the image. In both cases, this resulted in a few odd color casts in other parts of the image. In Carolyn's image, the bowl became knock-your-socks-off blue and had to be cut back using the saturation tool. With Alexa's image, the brightest parts of the daffodils got bluish highlights as well.
I am often asked if you can color correct an image. The answer is "sort of". Below is Carolyn's image corrected, as well as the corrected version of Alexa's tungsten image. In both cases, it was possible to neutralize the shadow (black) and highlight (white) parts of the image. In both cases, this resulted in a few odd color casts in other parts of the image. In Carolyn's image, the bowl became knock-your-socks-off blue and had to be cut back using the saturation tool. With Alexa's image, the brightest parts of the daffodils got bluish highlights as well.
The moral?? Try to set your white balance for your light source while you are shooting. It is much easier and less frustrating than trying to correct after the fact.


To correct this amber color cast while shooting, one could:
- use a flash. however, this would result in an image without the nifty shadows and highlights; the moodiness of the image would be less.
- set the white balance (WB) button to an indoor light setting, such as tungsten or fluorescent.
b..jpg) I am often asked if you can color correct an image. The answer is "sort of". Below is Carolyn's image corrected, as well as the corrected version of Alexa's tungsten image. In both cases, it was possible to neutralize the shadow (black) and highlight (white) parts of the image. In both cases, this resulted in a few odd color casts in other parts of the image. In Carolyn's image, the bowl became knock-your-socks-off blue and had to be cut back using the saturation tool. With Alexa's image, the brightest parts of the daffodils got bluish highlights as well.
I am often asked if you can color correct an image. The answer is "sort of". Below is Carolyn's image corrected, as well as the corrected version of Alexa's tungsten image. In both cases, it was possible to neutralize the shadow (black) and highlight (white) parts of the image. In both cases, this resulted in a few odd color casts in other parts of the image. In Carolyn's image, the bowl became knock-your-socks-off blue and had to be cut back using the saturation tool. With Alexa's image, the brightest parts of the daffodils got bluish highlights as well.The moral?? Try to set your white balance for your light source while you are shooting. It is much easier and less frustrating than trying to correct after the fact.
Alexa uses different light sources
The image below was shot indoors with camera set to "shade" white balance. The overall amber color of this image is commonly seen when images are:
 The image below was shot indoors without a flash, using tungsten white balance. Visual clues as to the camera's settings:

- Shot with AWB inside without a flash
- Shot with Daylight, Cloudy or Shade white balance indoors without a flash
To correct or neutralize the image, one could:
- Shoot with a flash
- Shoot without a flash and set the white balance to match the interior light source (tungsten or fluorescent)
 The image below was shot indoors without a flash, using tungsten white balance. Visual clues as to the camera's settings:
- Shadows are being cast from the upper right, indicating that the light source is not from the same direction as the camera.
- Soft, low contrast lighting. Suggests that the light source is fairly diffuse, such as an overhead fixture. Doesn't have the harshness of a flash used close-up.
A suggestion I would have to improve the intensity of the image using a Nikon slr would be to go to the camera menu setting, choose Optimize image and increase your saturation (you would find this on the custom optimized choice)

The image below was shot indoors using flash. The clue that it was shot with flash are the shadows behind the daffodils. Because the flash was more intense than the room light it created shadows. The position of the shadows indicates the light source was in line with the camera, the usual position for a flash.
The primary way of cutting the intensity of the shadows would be to go to your S mode and set the shutter speed to a longer time. This image was shot at 1/60 second. At 1/15 sec (4x as long) the shadows would be negligible. 1/15 sec is the shutter speed of the available light image above. It would be interesting to see if the color intensity of the above image would be greater with the addition of the flash. The downside of this test is the possibility of having incompatible light sources with both flash and tungsten.


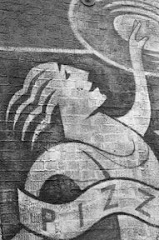
Marcia's floor of many colors
Found at MOMA in NYC. Road Trip, anyone? Oh, yes, Marcia's color is RED!
+lightened.jpg)
+lightened.jpg)
Monday, March 03, 2008
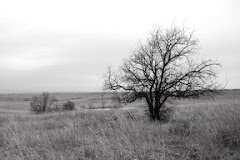
Alison's Great Green Adventure


 Mostly winter green, although the moss is very healthy everywhere. All three photos taken at Moran St. Park on Orcas Island in mid - February.
Subscribe to:
Posts (Atom)

e+b.jpg)
b..jpg)